There are two types of track sections: straight and curved. While the straight sections are straight-forward (pardon the pun), the curved sections can be a challenge.
Plan A
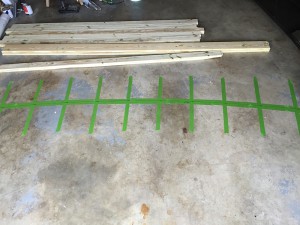
My first attempt to making a section of curved track was to lay out a template on the garage floor and use this template to guide the positioning of the cross ties and rails. I scribed an eight-foot long arc with a thirty-foot radius on the garage floor and marked it with tape. This is what it looked like:
Then I positioned the grooved cross-ties on the guides and tried to fit the rails in the grooves, bending them as necessary. I’d get one rail in one of the grooves, and something would pop out of another tie at the other end of the section. I might could have been successful with this approach if I had two dozen hands and the strength of ten men. So I quickly abandoned this and formulated Plan B.
Plan B
My second approach was to create a jig that would position the rails in a curved configuration and hold them so I could attach the ties. I fastened a set of cross-ties to a piece of plywood so that the rails would scribe the thirty-foot radius. By forcing the rails into the grooves, I could then have them held in place while I attached each of the cross-ties using deck screws. This worked much better, as you can see here.


Each eight-foot section of curved track covers about fifteen degrees of curvature, so it takes twenty-four sections to make the complete 360 degree circle. Using this template, I created all twenty-four sections. Then I created some more straight track sections to make up the gap. Next step was to see if the engine would follow the track without derailing.